I am developing shaders at the moment.
These are examples of some texturing tweaking of the clothing and sub surface scattering shader for Vaiva’s face.
Showing posts with label texturing. Show all posts
19 Mar 2012
Vaivas Body Colour Map
A little nuance.. I ran out of space for photos on blogger, so from now on I'm joinin photo bucket.
Vaiva's body colour is almost done. I'm thinking to revisit the top and match it to skirt's colour because it doesn't seem to blend that well now.
In couple of next days I'll be developing surface shaders .
Vaiva's body colour is almost done. I'm thinking to revisit the top and match it to skirt's colour because it doesn't seem to blend that well now.
In couple of next days I'll be developing surface shaders .
17 Mar 2012
Vaiva's Texturing Progress: The Head
Friday I have started texturing Vaiva. The head was challenging in that every storke was either working or not. Head's texturing so far is purely a colour map, meaning surface shaders are not yet created. It is a common aproach I take, after work placement in picassopictures, where purely colour map had to look as if it had many layering to it. So I move to creating surface shaders only after thecolour pass looks as good as possible.
The rest of the body as well as surface shaders , I suppose, will come along over next week :]
Original Concept:
I've looked at some eye shading tutorials. It went through a detailed process in photoshop and maya.
30 Nov 2011
Good Wolf's Resolution
Again, for his texture resolution I used the standard colour pass and added ambient occlusion bake and bump passes. A note for bump: I tried to reach a snow qualities of his fur. A simple noise worked rather nicely. I believe now the texture doesn’t look like pottery painting.
28 Nov 2011
Evil Wolf's Texturing
Much like for the doll's texturing I've used mental ray shaders, colour pass and ambient occlusion bake-in. The Bump map was applied only for the face (Nose and around the eyes) oppositely to the initial idea to make it scratchy and worn. I've figured that a deity type of character perhaps wouldn't be physically "damaged" as it is more of a spiritual embodiment.
27 Nov 2011
Development of WW: Character Rigging and Texturing
This week main focus was to finish rigs for both of the characters. The soft modification in the good wolf required some fixing, because some parts were collapsing as he is doing general moves. This was solved creating pose deformers.A very useful technique as I found it and am glad we were taught how to use it in our maya classes .
For the evil wolf , his shield-like structure was asking for a disparate type of movement for his parts. I have created a pre-set animation for all 4 of his legs, so as they move an illusion of the separate muscles moving is suggested.
The other part of the focus now is the texturing. Here is the doll’s colour pass finished.
I also used ambient occlusion bake-in and settings to quickly shape the
outlooks. This technique, used for the first time, seems thoroughly
useful now.
I have started some developments on the evil wolf’s texture. The
tweaked mental ray shader already it has 60 percent of the desired
looks, so I’m quite excited what can be done further when all the passes will be solved separately
5 Jun 2011
Dream Island Execution
Rainy Sunday asked for some serious painting. So I've coloured in the island. The image shows how a combination of matte paining and 3d set work together. Also, and this is the approach I've taken from work placement, this is a single test lambert shader (with transparency and normal maps)to see how colour pass does its work before going any further.
I've referenced festivals and carnivals, as places for where you experience total joy and excitement, for this environment. Together with deep rich purple and violet colour pallete I'm wishing to create a rich, dreamy and fluid, most painterly environment out of the three , where all the elements seem to flow into each other. The challenge is not to make it a pile of stuff . But there is something in the toolkit still waiting , which should be handy for that. That is varied shaders, lighting set up, motion (ncloth simulations and animation cycles for props).
And a CU test:
And a CU test:
29 Mar 2011
'Painting up' the Scenes
Last couple of days the time went on 'painting up' and retouching the scenes. Whether it meant building and bringing in last details, or 'painting' the set using lighting set up for the better final image result.
So to start with, The opening scenes only briefly suggest that Ivan perhaps isn't the only character in the story. As camera pushes through the workshop we notice one another model in the set, also on the notice board next to Ivan there is a worn-of sketch of other mish-mash models.
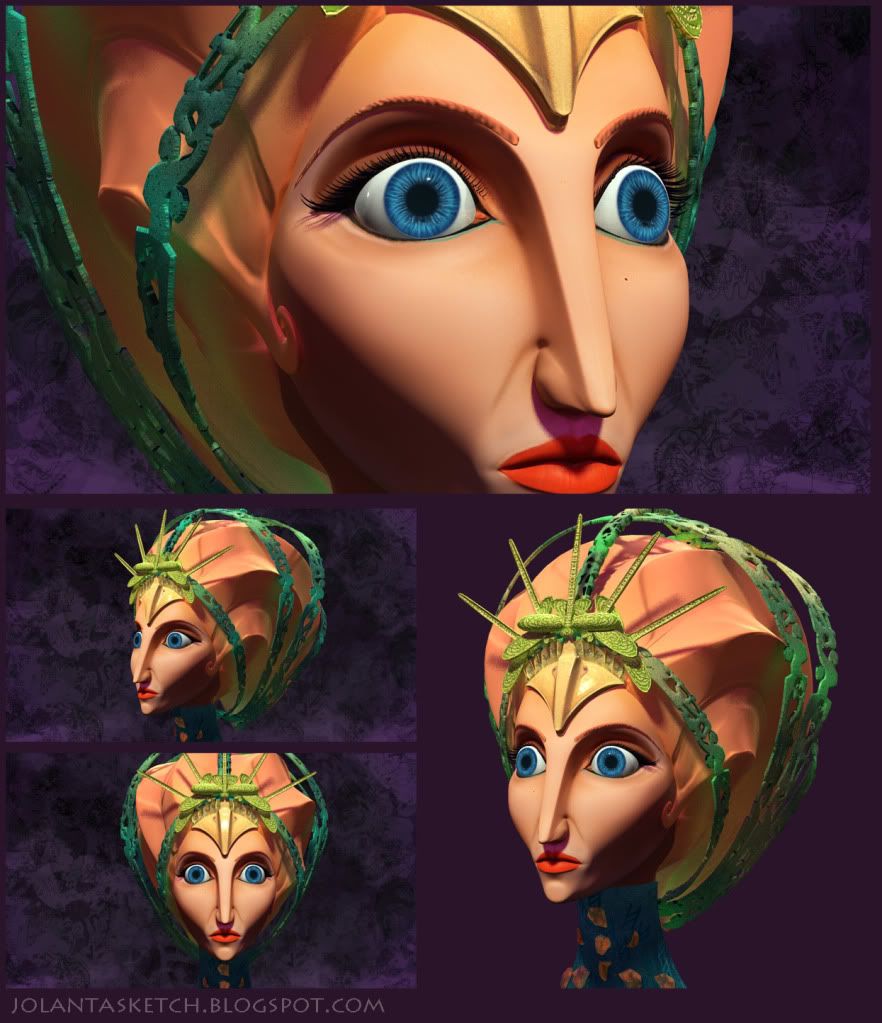
So I've designed and created the Shiball (she has ship parts and ball) character.
the texturing for this character:
Further I went back to the second environment again . First, trying to figure out ocean shader . With the help of Simon Holland, I think now it looks far better.
Other largest elements in the scene was the front modeled trees.
And the scene, after bringing the major elements together now looks like that:
However if this was a painting I'd say it lack of that last layer of details. And to be specific: Nests, waist disposals, wind vane on the house, foam for shore line, grass here and there, little statues , something to also cover the contact point of trees and the ground. Just lots of things nobody notices yet it somehow brings life to the scene.
Few more scenes are ready to be baked after spending that time for lighting, render setting.
Much like with animation, lighting is also getting easier and easier . Through trial, experimenting, reading on tips, it reaches the point when you are actually getting creative with it in maya , even if it is not as simple as making few brush strokes in photoshop. Light linking is used extensively to emphasize some of the set's and particularly character's aspects.
Lastly, I think this picture summarizes the work of past few days: the needed other elements are built and brought in ( outer environment) the lighting is set up, rendering (render settings, passes and effects) are adjusted.
Now I started working on show reel's element, and personal branding. Hopefully these will take no more than few days.
Subscribe to:
Posts (Atom)